In the (belated) spirit of April Fool’s Day, I wanted to slightly diverge from a strictly infosec topic and talk about something that can be used for good (work) or evil (trolling coworkers): Slack bots.
Incoming WebHooks
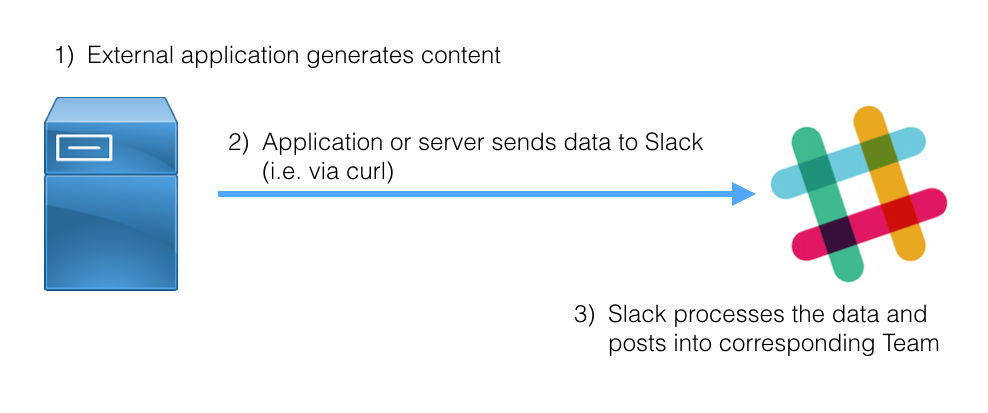
Incoming Webhooks allow external applications to post into Slack. The webhook processes HTTP requests sent to a provided URL. The data is stored in a JSON payload and processed by Slack on receipt. Incoming webhooks are a good choice when you want to post data into Slack from an external source that wasn’t requested by a user. Incoming webhooks can currently only post in public channels, they do not support direct messages, group chats, or private channels.
To use incoming webhooks, you need to add and configure the integration in your team’s Slack settings.
Setup Steps
In the Slack application or web interface, click the Team dropdown in the top-left. Select Apps and Integrations, then click Browse in the top-right, and search for “Incoming WebHooks” in the search bar. Click Add Configuration to add an incoming webhook to your channel.
-
Set
Post to Channelto any channel. You can specify the channel the post will be sent to with JSON later. -
Click Add Incoming WebHooks Integration.
-
Note the WebHook URL, we will use that in every webhook request.
-
Scroll down to Integration Settings. Modify the Descriptive Label, Customize-Name, or Customize Icon settings as desired; however, the bot name and icon will be modified with curl later.
-
Click
Save Settings
Now we’re good to go!
As an aside, if you plan to use this for trolling, it might make sense to make a new channel to add the webhook to. A notification is posted to the channel when the integration is added.
Using the WebHook
Basic usage example with curl:
curl -X POST --data-urlencode 'payload={"username": "Out-of-Towner", "icon_emoji": ":awha:", "channel": "#general", "text":"But what kind? What kind of shark?"}' https://hooks.slack.com/services/AAAAAAAAA/BBBBBBBBB/CCCCCCCCCCCCCCCCCCCCCCCC
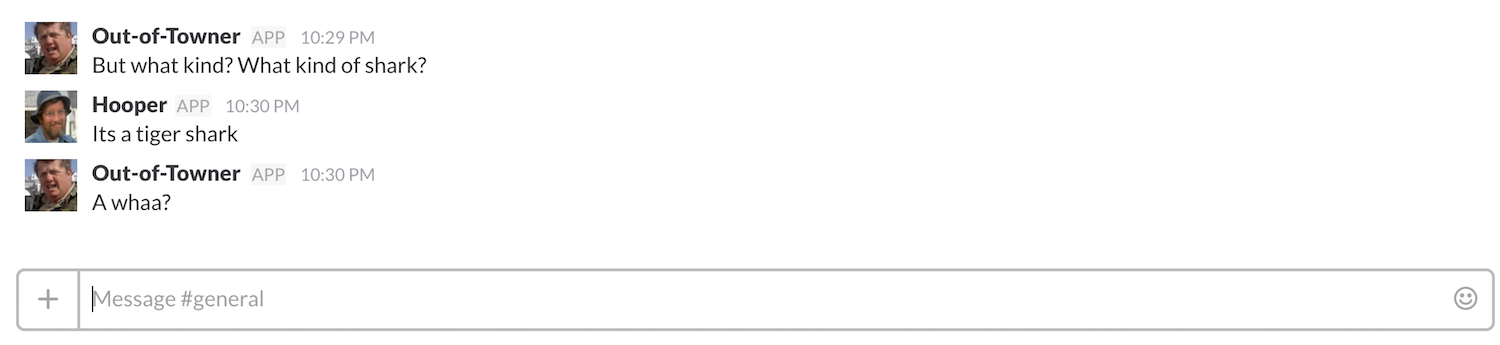
The payload section of the request is where the magic happens. We used it to configure the bot’s username, the bot icon (icon_emoji), channel, and message text. Since we can modify this info on the fly, we really only need one webhook integration for all of our bots.
Slack provide a bunch of neat features and functions for webhooks. Check out the official documentation for messages for info about basic formatting, attaching content & links, threading messages, interactive buttons, and message guidelines. The documentation also provides a message builder to easily hone how your message will look with a live-updating preview.
Cobalt Strike Integrations
To illustrate how incoming webhooks can be useful for security testers, let’s make a script that sends the Cobalt Strike event log to Slack. Something similar to this could be modified for use with just about any post-exploitation framework; however, some frameworks will require more creativity than others to implement. As a heads up, there will be some light Sleep and Aggressor scripting ahead! This post won’t go through the whole script, but will cover its basics to demonstrate how to post to Slack from Cobalt Strike.
Update 4/25/17: It’s important to note that you will be sending potentially sensitive information to Slack, such as usernames, target IPs, target hostnames, and teamserver info. Be sure to review the code and make modifications to prevent unwanted sensitive information from going to Slack, especially if you plan to use this on a production test.
The full code for this script is available on GitHub here. The final script has a GUI menu to configure the script settings within Cobalt Strike. Creating the GUI is outside the scope of this post, but for more info check out the official documentation on Custom Dialogs.
The script will use curl to send any messages received by the Aggressor event events, such as event_action or event_beacon_initial. For the curl command, we’ll need the incoming webhook URL, a channel to post the updates in, and an emoji shortcode for the bot icon. We get the webhook URL from the Slack configuration page, we can set up a new channel (#pentest in this example), and the emoji is easily found in the Slack interface.
Here are snippets of the script that send the message to Slack:
%slack_options["webhookURL"] = 'https://hooks.slack.com/services/AAAAAAAAA/BBBBBBBBB/CCCCCCCCCCCCCCCCCCCCCCCC';
%slack_options["channel"] = '#pentest';
%slack_options["emoji"] = ':robot_face:';
%slack_options["teamserver"] = localip();
%slack_options["enabled"] = 'false';

sub sendMessage {
    # $1 = timestamp of message, $2 = message
    $timestamp = formatDate($1,"MM/dd/yyyy - HH:mm:ss z");
    @curl_command = @('curl','-X','POST','--data-urlencode','payload={"username": "Cobalt Strike Bot", "icon_emoji": "' . %slack_options["emoji"] . '", "channel": "' . %slack_options["channel"] . '", "attachments" : [{ "pretext":"Server: ' . %slack_options["teamserver"] . ' Timestamp: ' . $timestamp . '" , "text" : "' . $2 . '"}]}',%slack_options["webhookURL"]);
    exec(@curl_command);
}
The first four lines set the scalars (variables) for the curl command. Line 5 sets the script to be disabled by default, to reduce message errors before configuring script settings. The sub sendMessage portion of the script defines a function to define the curl command and send the final message. The function is passed two arguments: a timestamp and message to send. This information is dervied from the triggering Aggressor scripting events.
Here’s a snippet of a few triggers:
on event_action {
	if (%slack_options["enabled"] eq 'true') {
		sendMessage($3,"$1 - $2");
	}
}

on event_beacon_initial {
	if (%slack_options["enabled"] eq 'true') {
		sendMessage($2,"initial Beacon from $1");
	}
}

on event_join {
	if (%slack_options["enabled"] eq 'true') {
		sendMessage($2,"$1 joined the server");
	}
}
Each event returns various arguments that can be used within their scriptblock. For example, on event_beacon_initial returns the contents of the event message as $1 and the message post timestamp as $2. The arguments are passed to sendMessage, with extra text as needed, for sending. We individually define the argument mapping and test for an enabled value of ‘true’ for each event in the final script.
Here’s the script in action:
Sidenote: To get the script to run even when no users are connected, use agscript within screen on the teamserver.
For another example of using incoming webhooks with Cobalt Strike, check out the post Slack Notifications for Cobalt Strike by Andrew Chiles at Threat Express
Custom Slash Commands
Slash commands provide the ability for Slack users to trigger and interact with third-party applications. The most popular example is using /giphy to return a random GIF matching the search phrase. Slash commands are more complex to implement than an incoming webhook, but not prohibitively so.
Here’s how the whole process works:

When a user runs the slash command, Slack sends the following information to the configured server:
- token
- team_id
- team_domain
- channel_id
- channel_name
- user_id
- user_name
- command
- text
- response_url
The server then validates the token, performs its magic, and returns a response to the response_url. Slack accepts similar formatting for Slash commands as it does for incoming webhooks. For more details, check out the official documentation.
To illustrate how to set up a custom slash command, we’ll walk through an example of creating a bot that takes a provided user’s name and returns a pre-canned troll for that user. The source for the example is available on GitHub here. The script is loosely based on Jan-Piet Mens’s Where are you slack team members at the moment? blog post and script.
Slack Setup
Under the App Directory, search for “Slash Commands.”
Choose the trigger command, enter it in the box, and click “Add Slash Command Integration.” For our example, we’ll configure our trigger as /troll.
Under Integration Settings, we will need to configure a URL, Method, Name, Icon, and (optionally) Autocomplete help text.
The URL will be the address of the host processing our slash command and returning the output. For our example, the server will be listening on port 8080.
The Method can remain POST. The options provided are POST and GET.
We’ll fill in the remaining info and click save.
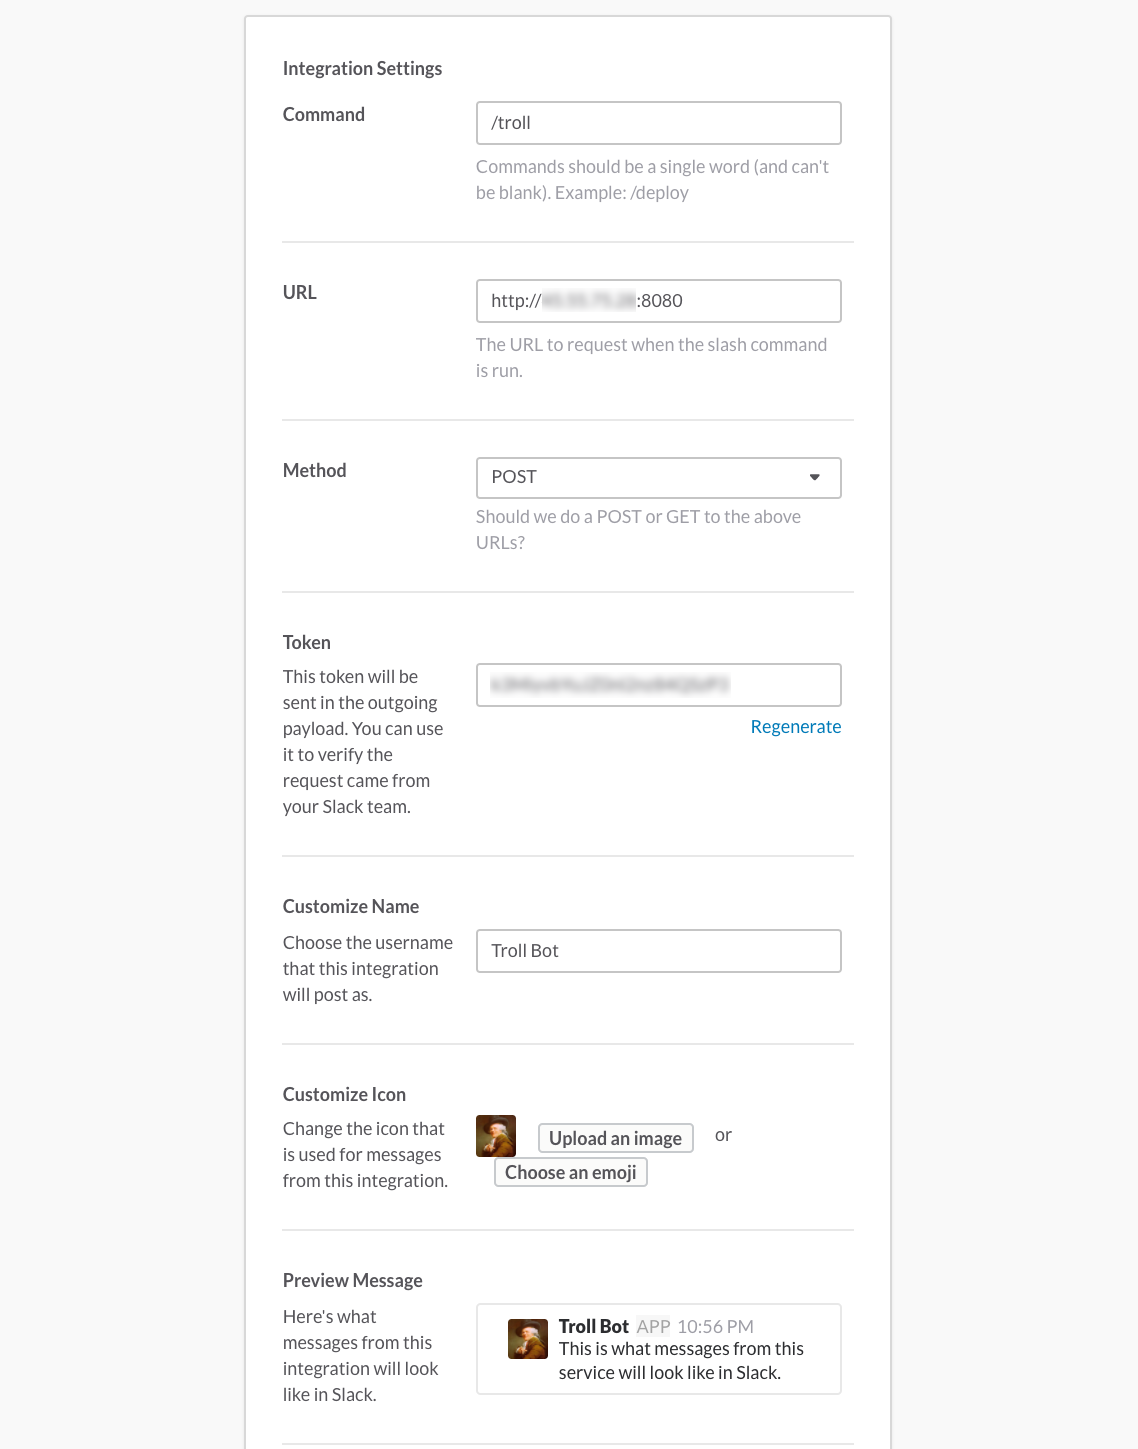
Note the token string. We will use that to filter unwanted requests to the server.
Now when we run /troll brody in Slack, it will send a request with “troll” as the command attribute, “brody” as the text attribute, and the other applicable information detailed above to the configured URL.
Server Setup
The server will consist of a Python script and a troll dictionary text file. You can either run it on a VPS or a PaaS provider, like Heroku. Using a VPS provides additional easy customizations, such as pulling our troll dictionary from a text file rather than a hardcoded dictionary, so this example will do that.
In short, our script will act as a web server and wait for Slack requests. When a request is received, the script validates the Slack token, looks in troll_dict.txt for a name (key) matching the provided name, and returns a random troll associated with that name to Slack. Slack will post the message into the channel from which the slash command originated.
Two important things to keep in mind when processing slash commands requests:
- Responses must be received by Slack within three seconds of the outgoing request. Otherwise, Slack will discard the response. If the script may take significant time to process a slash command request, use incoming webhooks for the response. (For an example of that, check out the story bot in the next section.)
- Responses can either be In Channel or Ephemeral. In Channel responses are posted in the channel the slash command originated from and are visible to everyone in that channel. Ephemeral responses are only visible to the user who ran the slash command. For more info, check out Slack’s documentation.
Our server script will rely on the Python Bottle framework to handle processing the incoming and outgoing requests. Install Bottle if it isn’t already:
pip install bottle
Next, we put our script, trollbot.py, and our dictionary of trolls, trolldict.txt, up on the server.
Modify the following settings in trollbot.py, as needed:
- Change the slack_token variable on line 19 to your slash command’s token. This is required for the script to work properly.
- Modify the file path for
trolldict.txtin the trollfile variable on line 22 if the file is not in the same directory astrollbot.py. - To change the port, modify the serverport variable on line 23.
Update trolldict.txt with your dank trolls using the format:
name%%troll
If multiple trolls are provided for one username, the script will select one randomly. As a caution, single quotes can cause the script to error out if they aren’t escaped properly.
Now we’re ready to go! Start the server:
python trollbot.py
Here’s a demo of the script in action:
Other Evil Ideas
Of course, there’s more evil that can be had using webhooks and slash commands in Slack.
Spamming Chat
Nothing beats a good old-fashioned spamming. With incoming webhooks, spam is as easy as a while true loop.
while true
do
curl -X POST --data-urlencode 'payload={"username": "SpookyBot", "icon_emoji": ":ghost:", "channel": "#spam", "text":":ghost:"}' https://hooks.slack.com/services/AAAAAAAAA/BBBBBBBBB/CCCCCCCCCCCCCCCCCCCCCCCC
done
A Bash script is available here for ease.
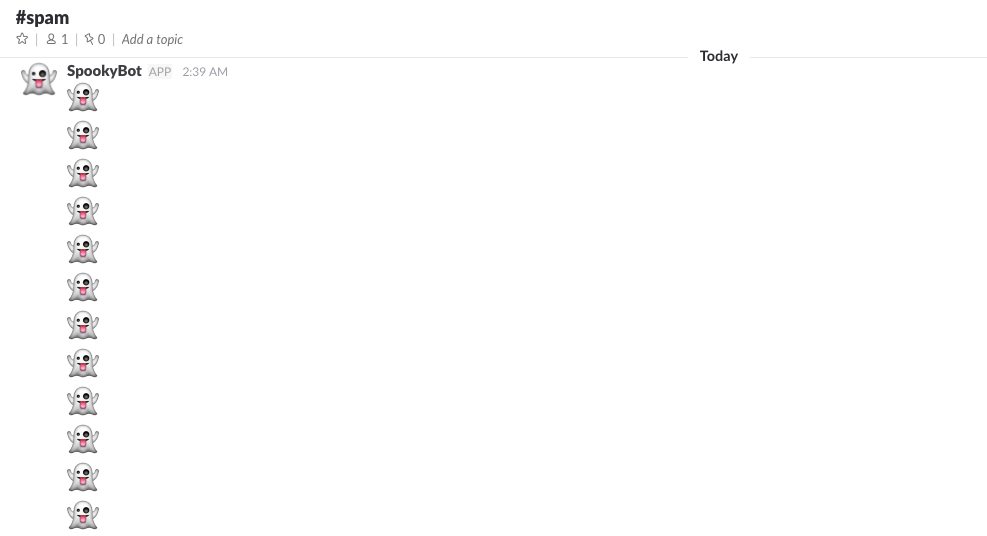
Slack limits incoming webhooks to one message per second, but it does “allow bursts over that limit for short periods.” In my “testing” I’ve found the bursts are generous. In fact, if you run a few of these loops in parallel, you can post so much that it causes everyone’s Slack app to slow down to the point of being unusable. Not that I know that from experience…
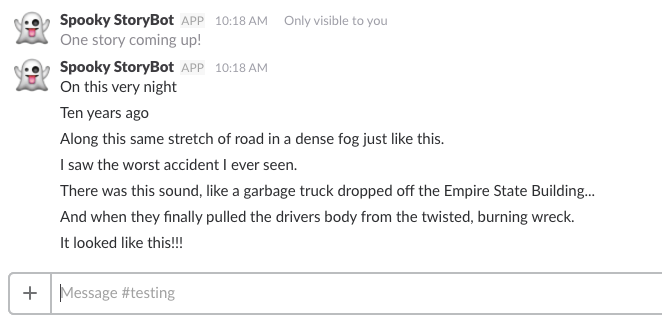
Storytime Bot
Everyone likes a good story. Why not add a nice, long story to Slack that can be triggered with a slash command? The source for this example is available on GitHub here.
The Slack and server setup are the same as the troll bot example above, with a few exceptions:
- We also need an incoming webhook configured
- We’ll use a different trigger word
- The script is
storybot.py - The story itself will be put in
story.txt, which is configurable with the storyfile variable on line 22.
Since the story will take longer than the three seconds Slack expects its response within, we’ll return an ephemeral response to the user who triggered the story as an acknowledgment and use incoming webhooks to post the story. The story will be pulled from a text file with each message’s text on a new line. To pace the story correctly, we’ll add some random sleep times between lines.
When the command /storytime is issued, the bot will run.
Using the script provided, it would be trivial to add more stories to the bot and trigger different ones with the slash command, like /storytime spooky.
Twitter Fame Checker Bot
Twitter can be a great source of useful, and less than useful, information that can be pulled into Slack. For instance, we could pull trending posts in a certain hashtag or see if a certain mountain in Seattle is “out.” Instead, we’ll make a slash command to pull a provided user’s internet fame (Twitter follower count) and post it in the channel.
To set this up, we’ll need to set up a slash command. In my example, I use the following syntax:
/famecheck [Twitter handle]
Place the final script on your server and modify the Slack slash command token (line 22) and, optionally, server port (line 24). The script uses Beautiful Soup to parse the follower count from Twitter. Install Beautiful Soup if it’s not present on your server:
pip install beautifulsoup4
Beautiful Soup usage is out of the scope of this post, but here is the the code that handles the follower parsing:
web_page = urllib2.urlopen(twitterurl).read()
soup = BeautifulSoup(web_page, 'html.parser')
c = str(soup.find('a', {'data-nav':'followers'}).contents).split('data-count="')[1].split('"')[0]
The script concatenates the follower count with a random snarky phrase about fame (pulled from a hardcoded list on line 37) and returns an In Channel message:

Errors are returned as an Ephemeral message.
Providing a mechanism for your Slack bots to parse web content opens the door to countless other lulz, but that’s an exercise left to the reader to determine and implement.
Looking Forward
Slack also provides a Bot User API, which allows users to interact with third-party applications via natural chat. The API provides a wealth of options and could prove useful for both work and teh lulz.
This post focused on Slack; however, most of the functionality covered should be possible on competing platforms. Both HipChat and Microsoft Teams provide APIs for third-party integrations.
Summary
We covered the incredibly useful incoming webhook and slash command APIs in Slack and demonstrated a few ways they can be used for work, such as integrating Cobalt Strike with Slack, and for fun, such as annoying coworkers. The post only scratches the surface of how powerful Slack integrations are. If these examples interested you, I encourage you to check out some of the cool ways people have integrated third-party applications with Slack and try it on your own. I’d love to hear about any Slack bots you come up with, especially those designed to annoy and harass those in your Slack team!